
This tutorial is so easy and barely even needs a step-by-step, but I wanted to share a couple of tips I've discovered along the way. This post contains affiliate links which cost you nothing, but I earn a small commission from purchases through them. Thank you for your support of my little blog!

Two years ago, I made this cardboard pumpkin patch for a Trunk Or Treat event at Cora's school. It was so easy to make and I loved the impact that it made. I was blessed with an abundance of cardboard boxes through work and was able to make these from start to finish in an hour with a little help from Ben.

This year, I dreamed of making a wood version of this for our front garden. I knew it would be a little more labor intensive than the throwaway cardboard ones, but I loved that we'd be able to use them for years to come. I'm more into the autumn decorations than the Halloween-themed decorations, so this is perfect.
SUPPLIES:
+ Plywood (I used OSB for mine because it's what I had on hand, but I would recommend plywood)
+ Craft paint (I'm not really brand loyal with this. I usually pick up whatever is cheapest at Michaels)
+ Foam brushes
+ Clear coat (I used this, but this spray paint is also a great option I use for other projects)
+ Sand paper
+ Jigsaw (I have this one and I love it so far)
+ Drill and screws
+ Clear coat (I used this, but this spray paint is also a great option I use for other projects)
+ Sand paper
+ Jigsaw (I have this one and I love it so far)
+ Drill and screws

1 . Draw a rough outline of pumpkins and use jigsaw to cut them out. Sidenote: I just got my jigsaw and loved ThriftDiving's tutorial on how to use it.
2 . Sand edges

3 . Paint. I like to squirt a couple different colors and lots of orange straight on the pumpkin. The different colors give it a little dimension without spending a bunch of time on it. I used orange and white for the cardboard ones and orange, dark red, and light pink for the wooden ones. I think it would also look good with a little yellow or even brown. You can paint the stem brown or leave it brown of the wood/carboard/whatever you're making the pumpkins out of.


4 . Paint black around the edges black and draw in lines.


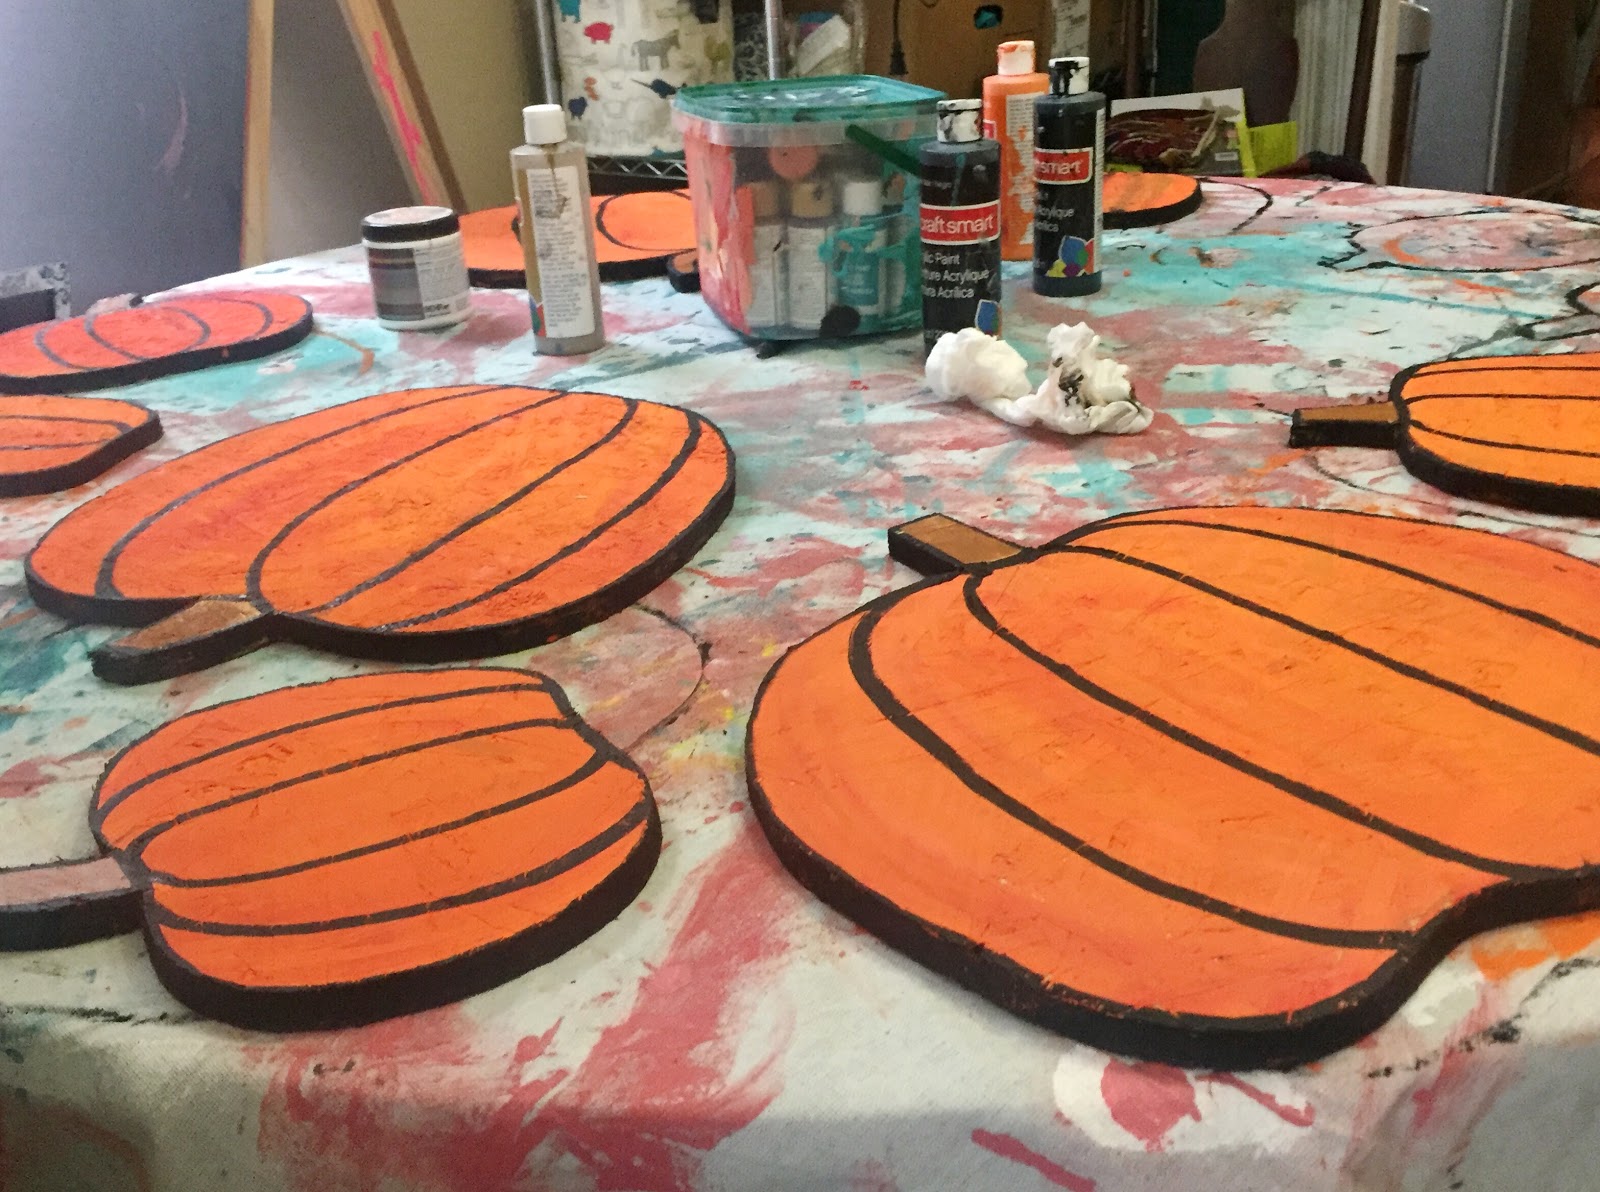
5 . Add a stake using screws. I ripped some salvaged pallets into skinnier pieces to create a small stake, but any skinny piece of wood should work. I attach them about halfway up the pumpkin. One screw in the middle and one near the bottom.
6 . Clear coat.
7 . Display!
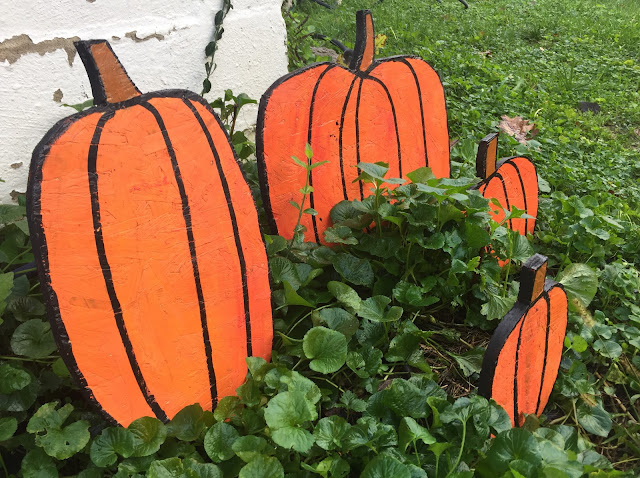
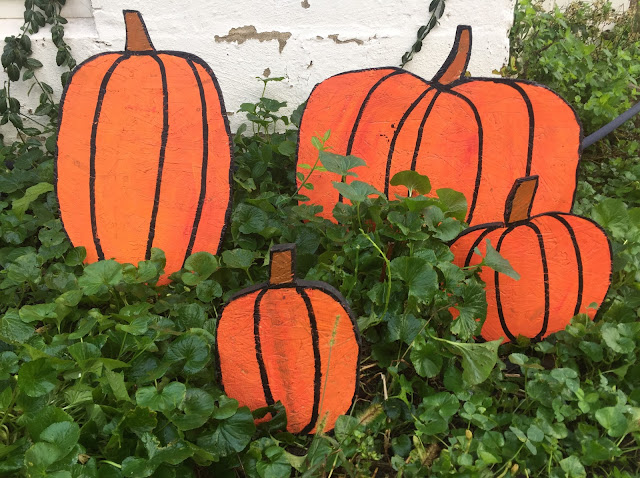 This weekend I'm planning on clearing out our front garden and setting all of the pumpkins up for the rest of the month. Where would you put your own little pumpkin patch?

 This weekend I'm planning on clearing out our front garden and setting all of the pumpkins up for the rest of the month. Where would you put your own little pumpkin patch?
No comments:
Post a Comment
Thanks for taking the time to comment. Have a golden day!